-
I cook as a hobby, and I maintain this blog primarily to keep track of recipes that my family has enjoyed over the years. I started blogging back in 2015, in response to requests from friends for recipes they had seen me post on Facebook (but that I couldn’t easily catalog). My original blog was on another platform that became less user-friendly over time. I migrated my blog to WordPress earlier this year, and I’ve spent more time than expected reformatting the migrated posts.
This blog is and always will be a work in progress. For example, I currently provide Tags for posts, but I have not coded for Categories. I also generally try to share the recipes themselves in my posts, but in cases where the recipe is not available online, I try to identify the source (e.g., the cookbook title and author) as needed. In some cases, such as where a family has shared their recipe with me but hasn’t authorized me to share it widely, I post a photo of the dish with that proviso.
I recently added a Search widget to this blog. On the desktop version, the Search bar appears prominently on the left hand side. But for some reason, it is hidden on the mobile app. If you’re on your phone, tap on the SHOW tab at the top left of the home page. That will reveal another screen with the Search bar.
I hope you enjoy exploring my blog and find some recipes to try.
-
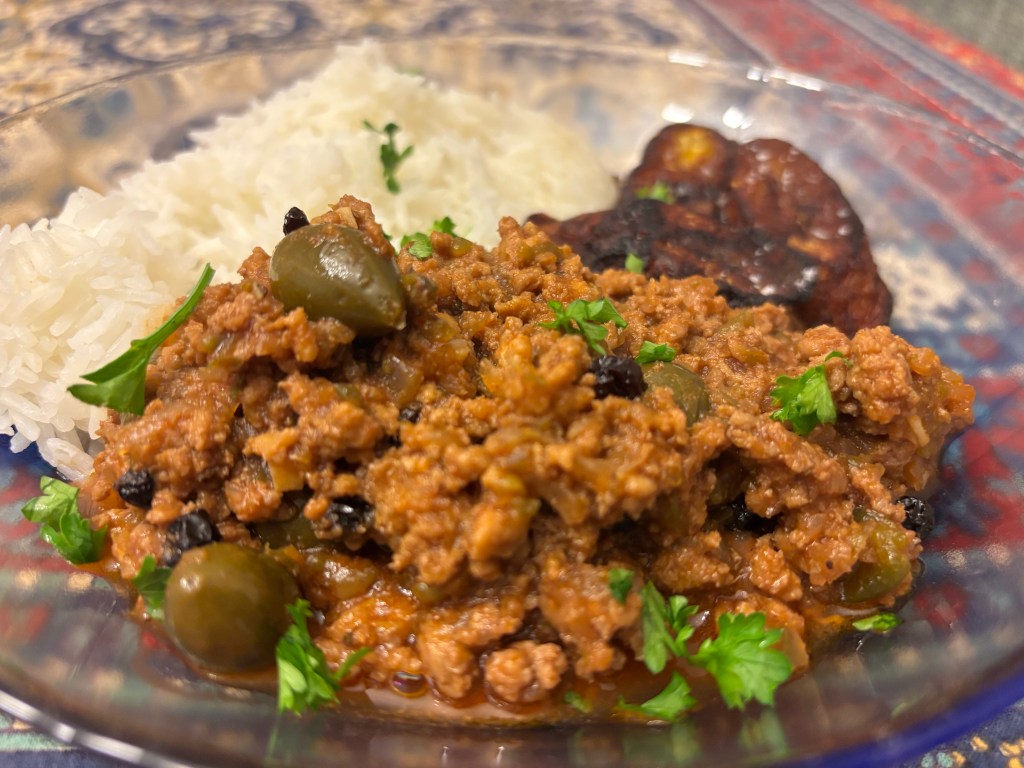
We tried this picadillo recipe: https://www.sandravalvassori.com/turkey-picadillo/. This recipe is our favorite picadillo recipe to date.
Our modifications: first, we used a mix of minced turkey (1 lb) and minced chicken (1/2 lb). Second, for tomato paste and tomato sauce, we used no-salt versions.
Third, based on our pantry, we made some substitutions: 1/2 cup caper berries (stems removed) with 2 Tbsp caper berry brine instead of Queen olives and brine; and 1/2 cup red wine instead of 1/2 cup white wine. We also added 1/4 cup Zante currants (a type of raisin). At the end of cooking, we sprinkled about 1/4 tsp of sugar for balance. We omitted the cilantro and the sazon seasoning, both of which were optional ingredients.
We served this picadillo with jasmine rice and fried sweet plantains (maduros). The caramelized maduros were a wonderful complement to the briny notes of the picadillo. (Oct. 2025)
-
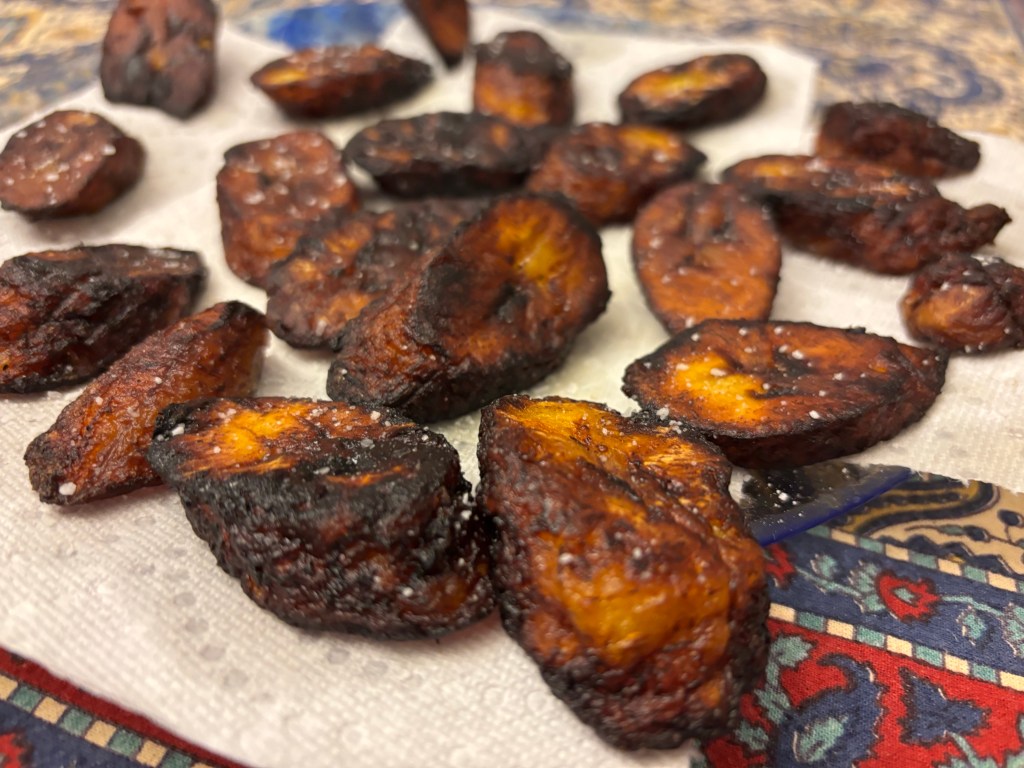
We often bake sweet plantains to make them healthier, but we decided to try this traditional preparation: https://mydominicankitchen.com/fried-sweet-plantain-slices-platanos-maduros-fritos/
We used a large nonstick pan and 3/4 cup canola oil (instead of 1 cup). Immediately after placing the cooked plantain slices on a paper towel-lined plate, we sprinkled them with a little kosher salt.
We served the maduros as a side dish for picadillo and rice, and it was the perfect complement. (Oct. 2025)
-
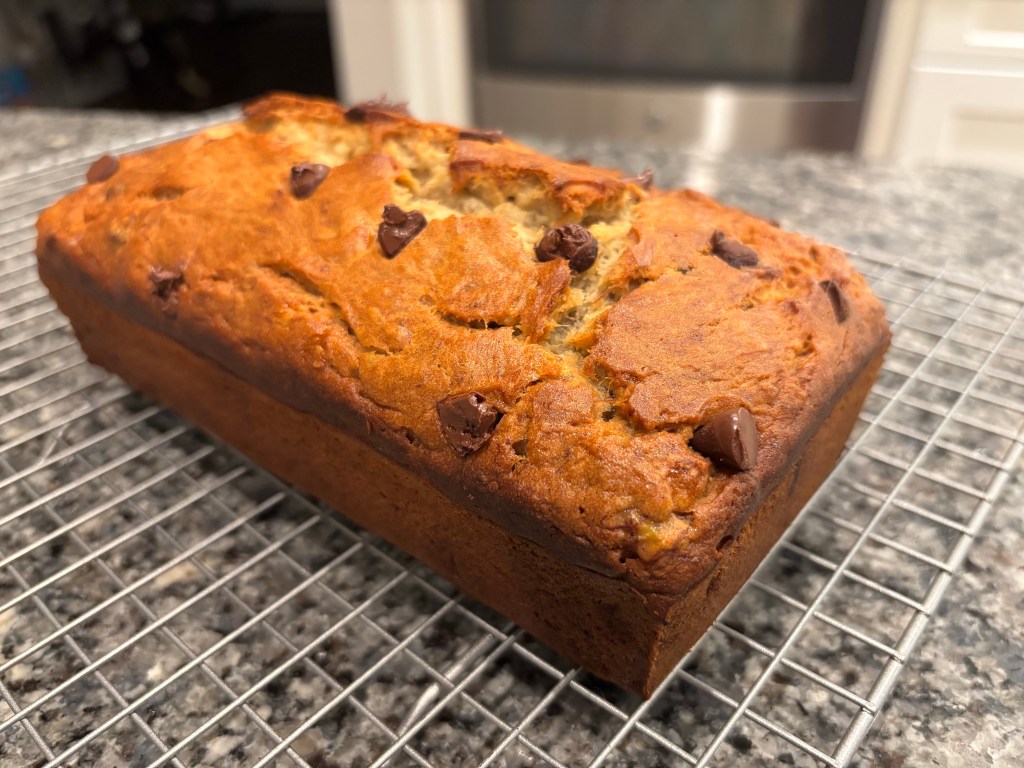
We had three overripe bananas, so we decided to try this recipe: https://www.simplyrecipes.com/recipes/banana_bread/
Our modifications: first, we used 1/2 cup white sugar. Second, after folding in the flour, we added 1/2 cup semi-sweet chocolate chips to the batter. (Oct. 2025)
-

We make scrambled eggs only a few times a year. This is one of those dishes that we take for granted as basic, yet has mixed results if the proper technique isn’t followed. This was a good opportunity for us to refresh best practices: https://www.seriouseats.com/fluffy-scrambled-eggs-recipe (Oct. 2025)
-
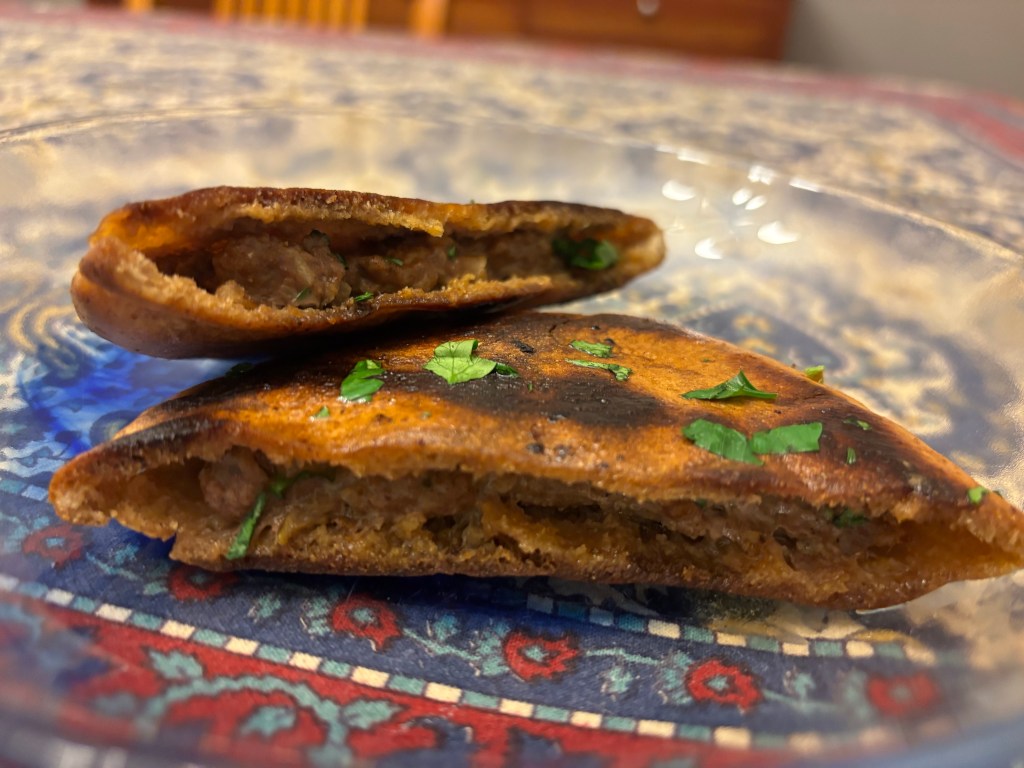
We tried this recipe from RecipeTin Eats: https://www.recipetineats.com/arayes-lebanese-meat-stuffed-pita/ We used 1 lb minced beef for the recipe.
Our modifications: first, we followed the spice blend in the recipe except that we used 1/2 tsp ground Kashmiri pepper instead of cayenne. we could not find large pita, so we used five Middle East Bakery’s whole wheat pita (5.5” in diameter), each cut in half. Third, because we kept the seasoned meat in ten portions (1/4 cup each), the stuffed pockets were thicker than the original recipe anticipated. Accordingly, we seared each piece in the pan for about 8 mins total, flipping as needed. We also followed the blogger’s tip to keep the cooked arayes warm in the oven at 170 degrees (our oven wouldn’t set at 120); we used a foil-lined rimmed baking sheet with a rack on top.
Fourth, we skipped the tahini dressing. Instead, we made our favorite hummus recipe: https://piglettedc.wordpress.com/2015/03/25/hummus-drain-15-oz-canned-chick-peas-setting/
We served the arayes and hummus with a simple salad (romaine lettuce, celery, Persian cucumber, and grape tomato). We enjoy this meal a lot. (Oct. 2025)
-
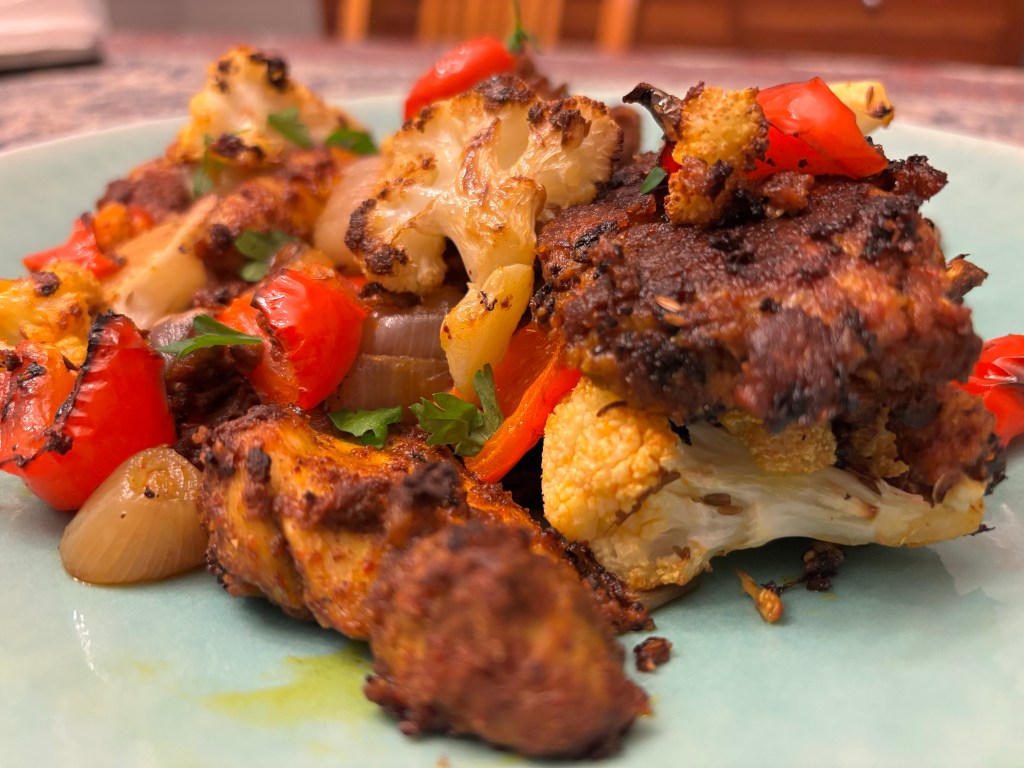
We found this recipe intriguing and decided to give it a try: https://cooking.nytimes.com/recipes/1025554-sheet-pan-chicken-tikka-thighs?smid=ck-recipe-iOS-share This was remarkably flavorful, with great mouthfeel; it’s definitely a keeper.
Our modifications: first, 1.25 lb was the smallest unit of boneless chicken thighs we could find, so we slightly rounded up the other ingredients. For the yogurt, we used Fage nonfat plain Greek yogurt (we couldn’t find full fat); we supplemented by adding extra oil (1/2 tsp) to the marinade.
Second, in addition to poking a fork liberally through the raw chicken, we cut each thigh into 3 strips each to ensure even cooking.
Third, for the vegetables we used 1 bell pepper (reduced from 2), cut into 1” squares; 1/4 of a large head of cauliflower, cut into bite-sized florets; and 4 shallots, cut into 1/2” cross-grain pieces.
Fourth, in order to avoid overcrowding the chicken and veggies, we spread them out on 2 foil-lined rimmed baking sheets.
Finally, due to our sensitive smoke alarm, we had to improvise the cooking temps to 400 (15 mins), then 450 (10 mins), and then on low broil (3 mins). We served this dish with freshly made basmati rice. (Oct. 2025)
-
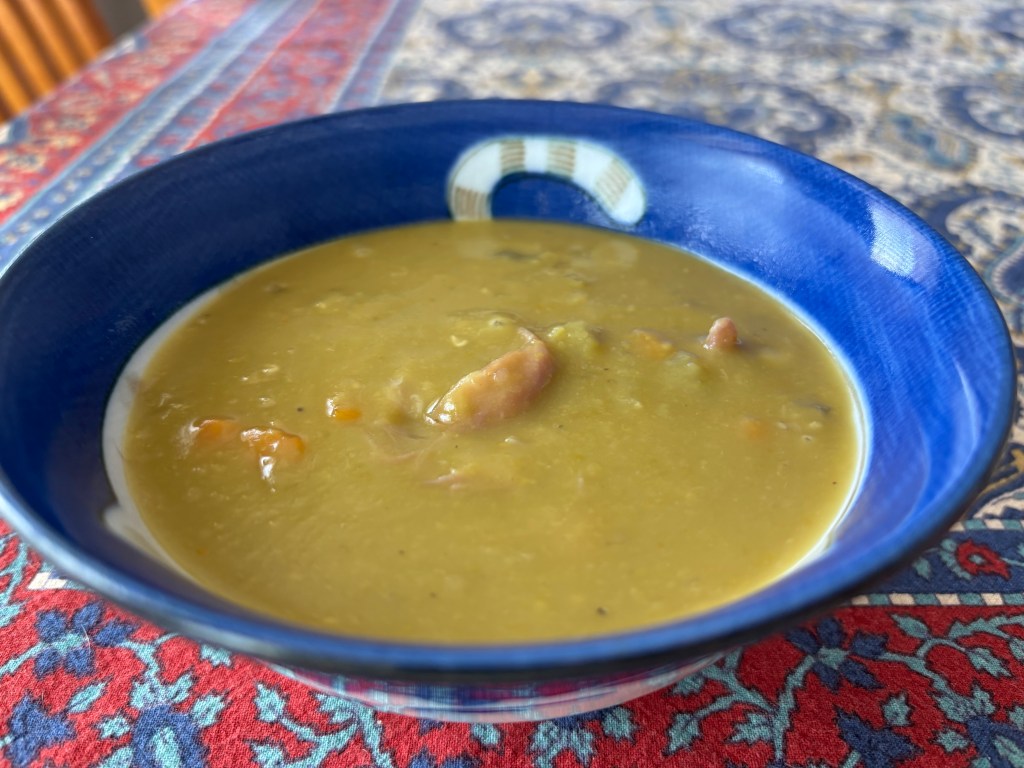
We had a craving for split pea soup and were intrigued by this recipe: https://www.recipetineats.com/pea-and-ham-soup/
As a child, I first had split pea soup with ham at a family friend’s house, and I remember being astonished that it took several hours of simmering on the stovetop. This recipe offers a great way to make this soup at warp speed (about 90 mins).
Our modifications: first, although we used smoked ham hocks, we reduced the amount from 2 1/2 lb (approx 5 hocks) to approx. 1.5 lb (3 hocks). Second, the hocks’ collagen and bone contributed to the soup’s flavor and texture, but yielded only about 1 Tbsp of actual pork meat (and 1 cup of tender pork skin, which we cut into bite-sized pieces and set aside for those, like me, who don’t mind the texture). This means we used the ham hocks mainly as part of the cooking process (like the bay leaves), and not as a visible component of the final soup.
Second, we made this recipe in our Instant Pot. We pressure-cooked on high for 120 mins. The recipe doesn’t specify, but you can do a quick release at that point rather than waiting 45+ mins for a natural release.
This yielded a delicious and satisfying soup. We will make this again. (Sept. 2025)
-
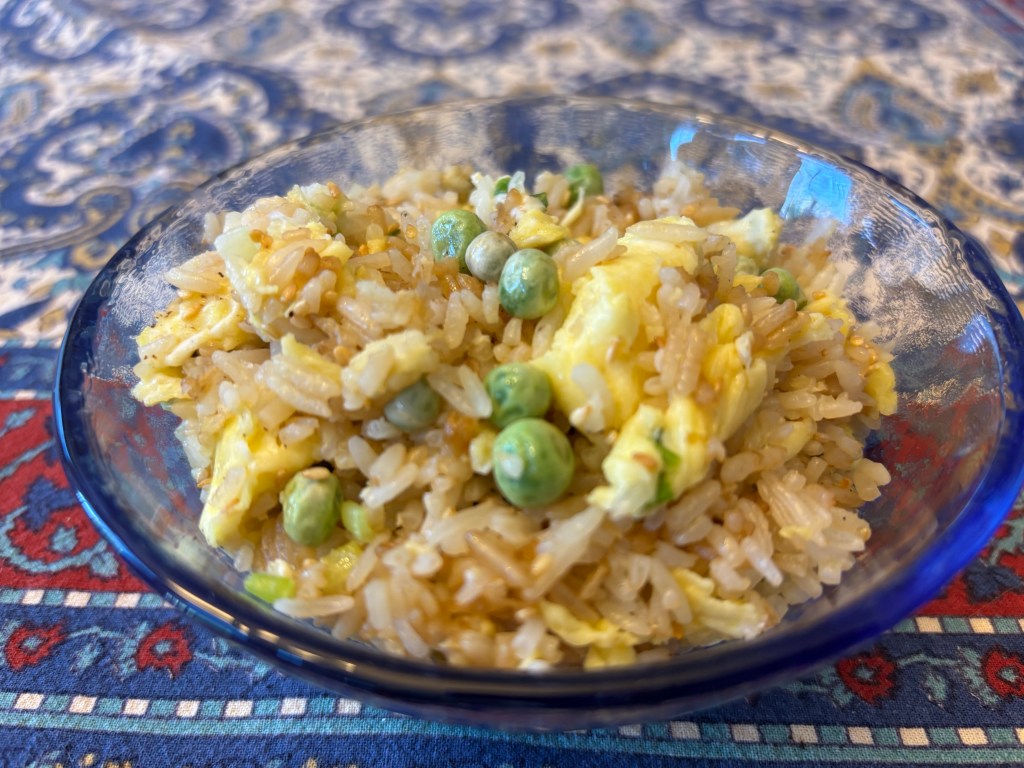
We had a craving for a mildly seasoned fried rice, so we tried this: https://www.koreanbapsang.com/egg-fried-rice-gyeran-bokkeumbap/
We found this recipe simple to make and delicious. It was reminiscent of chaufa blanco, a Chinese-Peruvian fried rice tossed with egg white, asparagus, and toasted sesame oil.
Our only modification was to add 1/2 cup frozen peas. This was a good use of frozen cooked jasmine rice, which we thawed on the counter. We also appreciated the cooking tips about sauteeing finely minced scallions in oil to release their fragrance and the technique for scrambling eggs. (Sept. 2025)
-
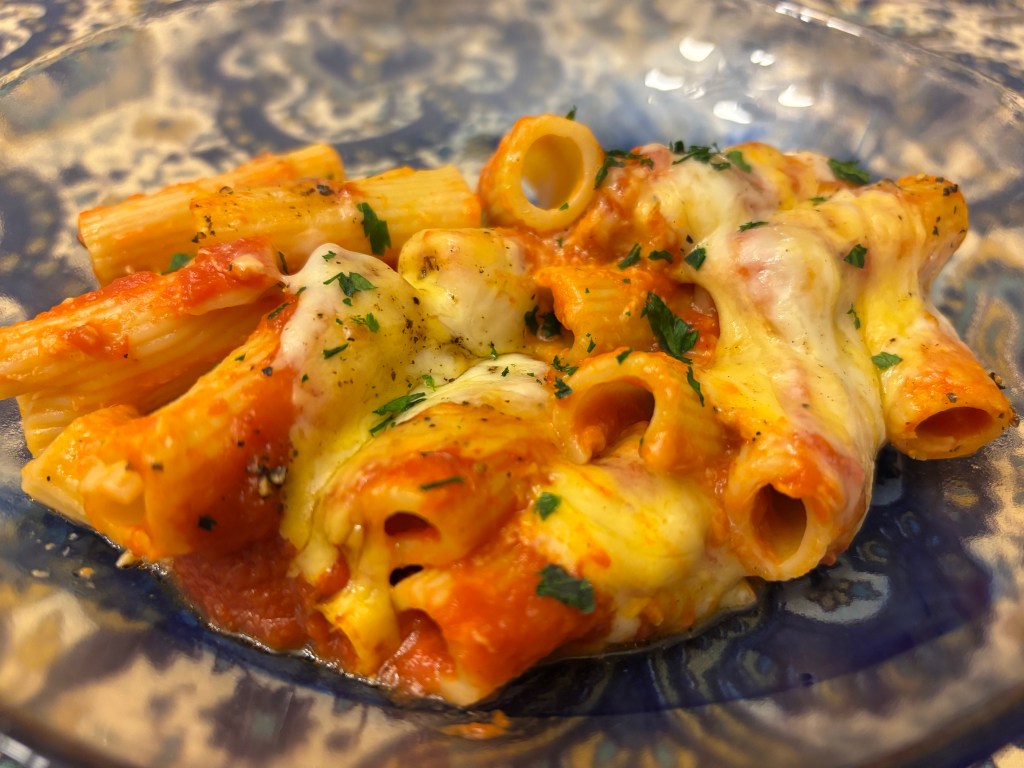
We had a craving for baked ziti, but we had limited ingredients in our pantry – 1 lb uncooked ziti, Rao’s marinara sauce, and some cheese. We tried this simple recipe that doesn’t use ricotta cheese or heavy cream: https://asimplepalate.com/blog/easy-baked-ziti/
Our modifications: first, to manage sodium for the 3 cups of tomato sauce, we combined 15.5 oz Rao’s marinara sauce with 8 oz no-salt tomato sauce. We also added a few shakes of crushed red pepper. Second, for cheese we used 1/4 cup grated parmesan, 2 rectangular snack pieces of Tillamook white cheddar (which we hand-tore into chunks), and 8 oz Tillamook Mexican cheese blend. Third, we cooked the pasta one minute less than directed so that it wouldn’t get soggy in the oven. This was a satisfying and tasty dish. (Aug. 2025)
-

We stumbled upon this version of Japanese curry, and it was delicious: https://www.japanesecooking101.com/pork-and-cabbage-curry/
Our modifications: first, instead of 12 oz thinly sliced pork, we used 10 oz thinly sliced beef. Second, we used less than 1/2 head of a small cabbage – probably closer 1/3 head. Third, we used 1/2 package of S&B hot curry (7.8 oz box) and accordingly added 2 2/3 cups (660 ml) water, more than the 2 cups called for in the recipe. We also let the finished curry simmer for an additional 5 mins to ensure the cabbage was fully cooked. We served this with jasmine rice. (Aug. 2025)
Note 1: The texture of the beef complemented the onion and cabbage, which were tender and succulent. The cabbage completely lost its cabbage-y odor and worked really well with the curry. We were surprised by the flavor and texture of this dish. We will make it again.
Note 2: Thinly sliced chicken also worked well in this dish. For 16 oz (1 lb) sliced chicken, we used 3/4 of a small head of cabbage, 1 large onion, 2 Tbsp microplaned ginger, 1 package (7.8 oz) of S&B hot curry, and 1200 ml (approx. 4.85 cups water, which we later supplemented with 1/4 cup water (May 2026).
-
Subscribe
Subscribed
Already have a WordPress.com account? Log in now.
