-
I cook as a hobby, and I maintain this blog primarily to keep track of recipes that my family has enjoyed over the years. I started blogging back in 2015, in response to requests from friends for recipes they had seen me post on Facebook (but that I couldn’t easily catalog). My original blog was on another platform that became less user-friendly over time. I migrated my blog to WordPress earlier this year, and I’ve spent more time than expected reformatting the migrated posts.
This blog is and always will be a work in progress. For example, I currently provide Tags for posts, but I have not coded for Categories. I also generally try to share the recipes themselves in my posts, but in cases where the recipe is not available online, I try to identify the source (e.g., the cookbook title and author) as needed. In some cases, such as where a family has shared their recipe with me but hasn’t authorized me to share it widely, I post a photo of the dish with that proviso.
I recently added a Search widget to this blog. On the desktop version, the Search bar appears prominently on the left hand side. But for some reason, it is hidden on the mobile app. If you’re on your phone, tap on the SHOW tab at the top left of the home page. That will reveal another screen with the Search bar.
I hope you enjoy exploring my blog and find some recipes to try.
-
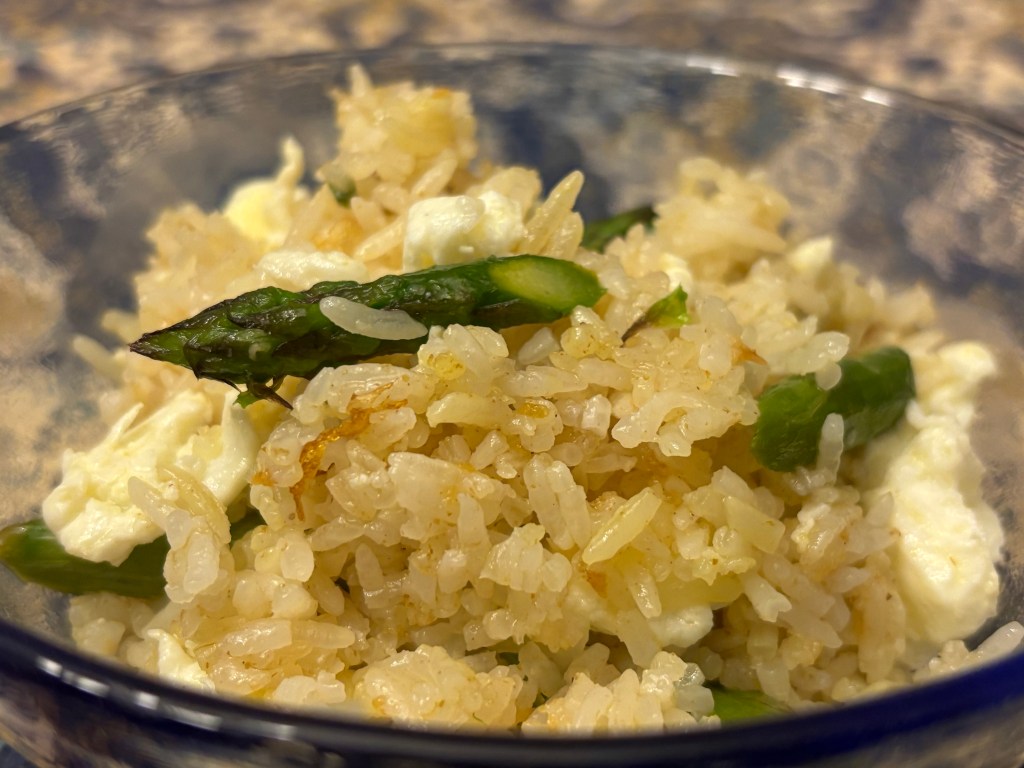
We first encountered a dish called chaufa blanco at Pisco y Nazca Peruvian restaurant, and we were blown away. Also called arroz chaufa blanco, it refers to fried rice seasoned without soy sauce. The Pisco y Nazca version featured only asparagus and egg whites, and it was not heavily seasoned except for toasted sesame oil.
We were not able to find a specific recipe for chaufa blanco, but we loosely followed some tips from AI. Here’s our ad hoc recipe:
First, the night before, place 4 cups of cooked white jasmine rice in the fridge, spreading out so that the rice grains can separate and dry (we use a rimmed half-sheet pan, either covered in foil / Saran Wrap or by placing the rice into a gallon-sized food storage bag lying flat (but open) in the pan). Let that rice sit in the fridge overnight until you’re ready to cook.
Second, on the day of cooking: separate four eggs and place the egg whites only in a small mixing bowl (save the four yolks for another use). Stir in 1/8 tsp ground white pepper. Heat a large nonstick pan on medium heat with 2 tsp canola oil, then add the egg white. Lightly scramble until the egg whites are just set but still runny, then place back in the mixing bowl and set aside.
Third, microplane 2 tsp each fresh ginger and garlic (about 2 cloves) and finely chop the white part of one scallion (you can save the scallion green for another use); place in one prep bowl. Separately, prep about 6-7 asparagus spears. Remove tough ends, and then cut spears along a 2” diagonal; place in a different bowl.
Fourth, using the same nonstick pan, add 1 tsp canola oil. Add the ginger, garlic, and scallion mixture and saute until fragrant (about a min). Then add 1 tsp canola oil and 1/2 tsp ground cumin. Saute for 1 minute.
Fifth, add 1 tsp toasted sesame oil to the garlic, ginger, scallion, cumin mixture, then add the asparagus pieces. Saute until asparagus is crisp-tender, about 2-3 mins (see Note below). Next, add the four cups of cooked white rice to the pan, breaking up clumps and making sure the rice is heated through. Raise the heat to medium-high to slightly sear the rice.
Sixth, lower the heat back to medium, then fold in the partially cooked egg whites. Lightly saute until egg is fully cooked and incorporated into the dish, about 1 min.
Finally, season to taste with salt (we added about 1/4 to 1/2 tsp). Serve immediately. We enjoyed this dish a lot. It was not exactly like Pisco y Nazca’s version, but surprisingly close. We will make this again. (Oct. 2025)
Note: We noticed that our asparagus lost the attractive bright green hue that the restaurant version had. The next time, we may saute the asparagus until crisp-tender as the first step, then set aside before partially cooking the egg white, aromatics, rice, etc. Then we can fold the partially cooked asparagus and egg whites into the rice during the final minute of cooking.
-
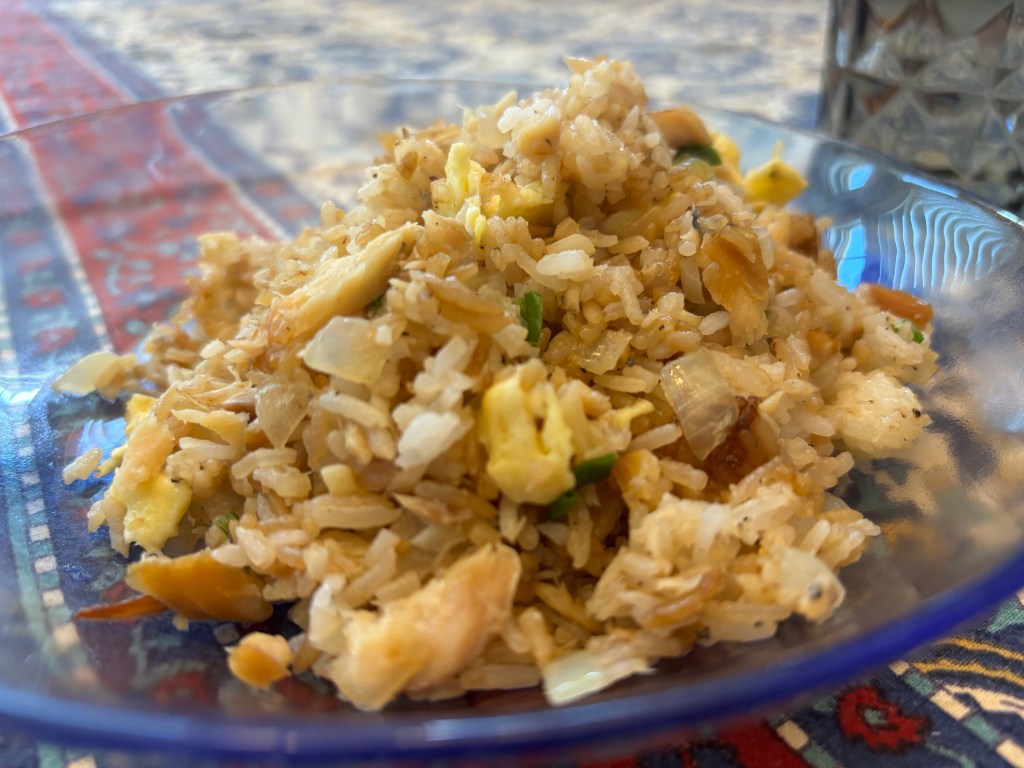
Today we decided to try this Filipino fried rice recipe with smoked fish we had on hand: https://www.kawalingpinoy.com/tinapa-fried-rice/. According to this Wikipedia (https://en.wikipedia.org/wiki/Tinapa), tinapa means smoked fish in Tagalog, and the most common fish are milkfish and scags.
We closely followed the recipe except for the following modifications: first, in lieu of 4 whole smoked tinapa, we used 8 oz of Trader Joe’s smoked trout (2 boneless filets); this yielded 1.5 cups flaked smoked trout (see Note below). We also skipped adding salt, since both the smoked fish and soy sauce would provide ample sodium.
Second, we reduced the chopped scallions to just greens from one scallion, rather than using two scallions (white and green parts).
Finally, at the end of cooking, we drizzled the fried rice with 1/2 tsp toasted sesame oil and 1 tsp Marukan rice vinegar (green label) for balance and brightness. (Oct. 2025)
Note: This dish was tasty, but a little saltier than we would have preferred. In the future, we may cut down the smoked fish to 4 oz (3/4 cup, i.e., 4 oz) and increase the scrambled egg to 3 large eggs (instead of 2). For contrasting texture, one could add a sprinkle of fried shallots before serving.
-
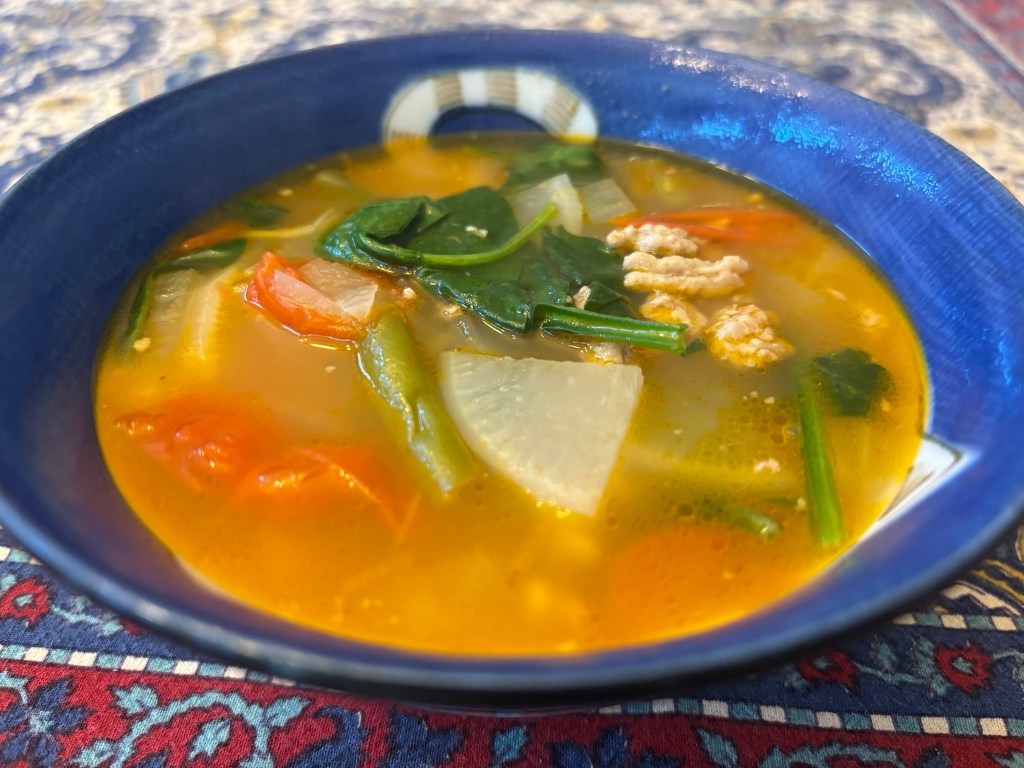
We have been in search of recipes to help us clean out our fridge, freezer, and pantry. We followed this recipe, but adjusted the meat and vegetables: https://www.thekitchn.com/sinigang-recipe-23687279.
Our modifications: first, instead of 1.5 lb bone-in pork, we used 1/2 lb minced pork. Second, for the tomatoes we used 1/2 cup grape tomatoes, each cut into halves. After we poured the 5 cups of water into pot containing the sauteed aromatics (onion, garlic, tomato) and browned minced pork with tamarind powder and fish sauce, we found 20 mins too long to boil; we reduced cooking time to 10 mins before adding the vegetables.
Third, for the vegetables, we used what we had on hand: 1 small Yukon potato, cut into 1/2” thick, bite-sized pieces; 1 cup daikon radish, cut into 1/2” thick, bite-sized pieces; and 1.5 cups green beans, diagonally cut into 2” long pieces. Later, after turning the heat off and just before serving, we added 2 cups of baby spinach, which cooked in the ambient heat.
Finally, we followed the seasonings as directed – 2 Tbsp Mama Sita sinigang powder (which is approx. 1/2 packet) and 2 Tbsp fish sauce. We initially omitted the salt, but later seasoned with 1/4 tsp salt, 1/2 tsp black pepper, and 1/4 tsp sugar for balance.
We served this soup with jasmine rice. This version of sinigang was very tasty, and we will make it again. (Oct. 2025)
-
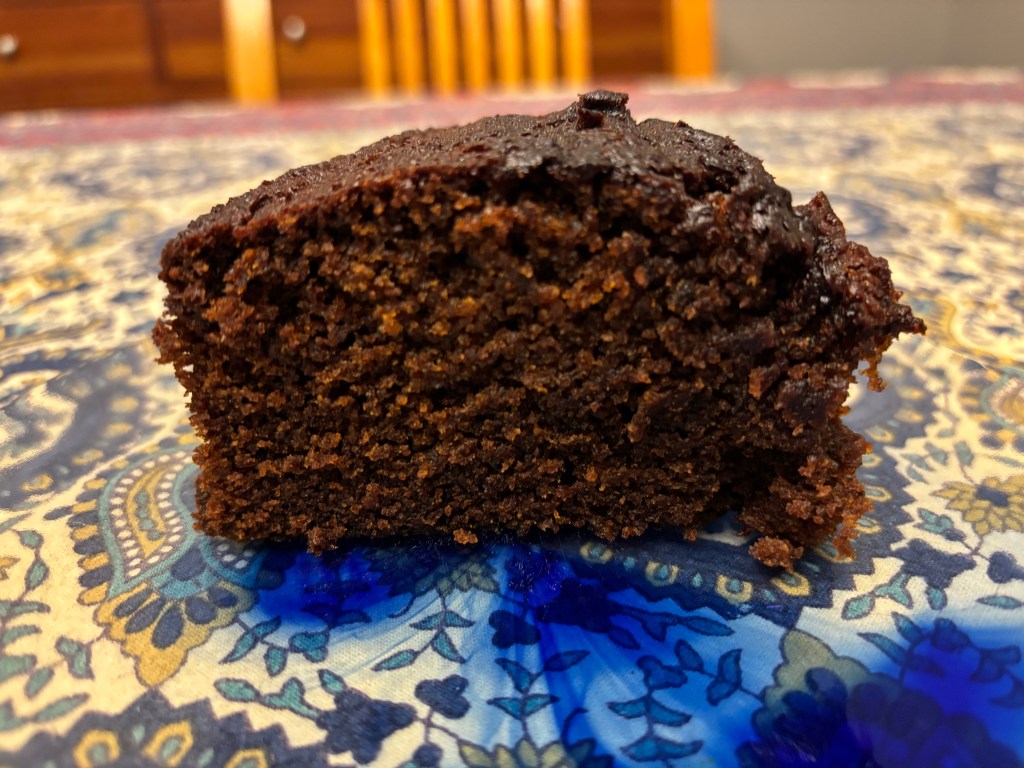
For the past few days, I have dreamt of a molasses cake that I used to buy in the early aughts at Marvelous Market, a now-defunct local chain that served delicious baked goods. They sold their molasses cake in square-shaped slabs, similar to the freshly baked cornbread at Whole Foods. The cake had notes of clove, cinnamon, and ginger.
We decided to try this recipe: https://cooking.nytimes.com/recipes/1019168-fresh-ginger-cake?smid=ck-recipe-iOS-share. It is delicious, richly spiced, and moist. For the molasses, we used Grandma’s Original Molasses (unsulphured).
Our only modification: for the fresh ginger, we used frozen, peeled ginger knobs that we microplaned into a 1-cup dry measure. (We based the measurement on a helpful note from a fellow NYT reader that 4 oz fresh ginger = 1 cup.)
We also followed the instructions to use a 9-inch springform cake pan with 3” sides. We greased the bottom and sides with unsalted butter, and then we lined the bottom with a circle of parchment, guided by these helpful tips: https://www.thekitchn.com/how-to-line-a-round-cake-pan-with-parchment-cooking-lessons-from-the-kitchn-78450. Unlike Marvelous Market’s molasses cake, our slices aren’t square-shaped. But the flavor and texture are close enough to evoke nostalgia. (Oct. 2025)
-
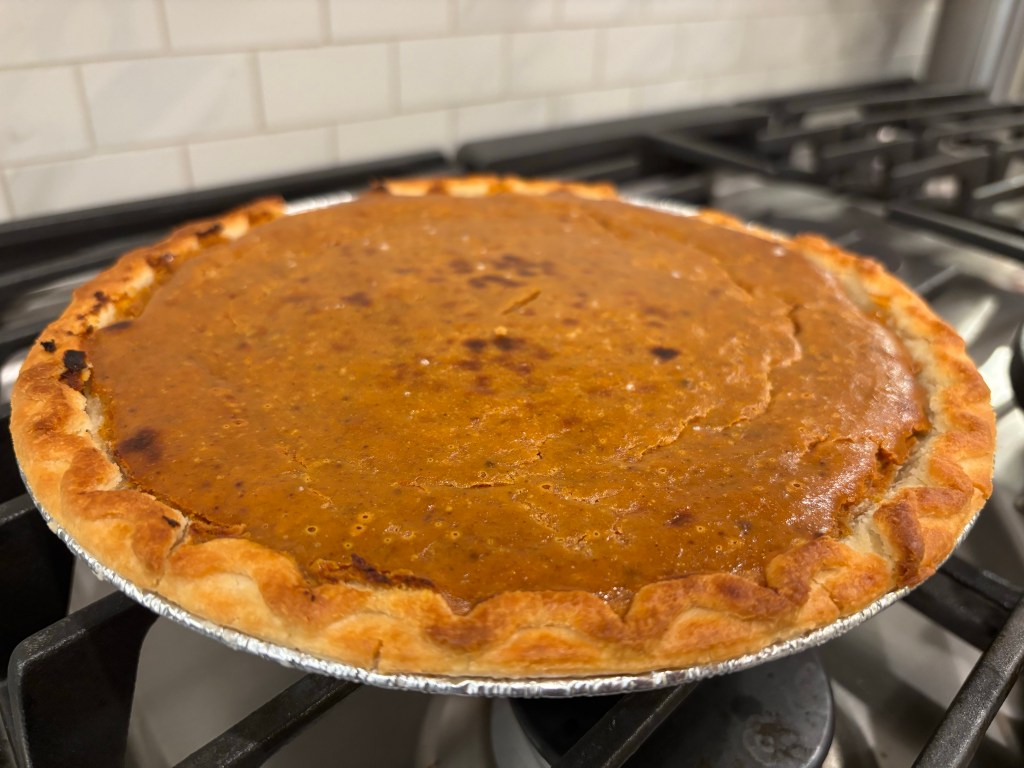
We misplaced our pie weights, so we weren’t able to blind-bake (prebake) a frozen pie crust. We decided to try this recipe, which calls for a frozen crust: https://startcooking.com/pumpkin-pie-for-beginners.
Our modifications: first, we placed a foil-lined rimmed baking sheet in the oven before preheating to 425.
Second, in lieu of 1 Tbsp pumpkin pie spice, we used 1 tsp ground cinnamon, 1 tsp ground nutmeg, 1/2 tsp ground ginger, 1/4 tsp ground clove, 1/4 tsp kosher salt, and 1/4 tsp each mastic gum and malepi (crushed with a mortar and pestle).
Finally, once we finished preparing the pie filling, we prepped the frozen pie crust by placing it on a kitchen counter (not the heated baking sheet) and covering the edges with foil (three 3-4” wide strips that we folded lengthwise to wrap around the rim). We placed the frozen pie crust on the heated baking sheet, and then we poured in the filling.
We baked at 425 for 15 mins, then reduced the temperature to 350 until a knife came out clean (about 30 mins). We then removed the foil from the pie crust, and then placed under the broiler on the Low setting until browned (3-4 mins). (Oct. 2025)
-
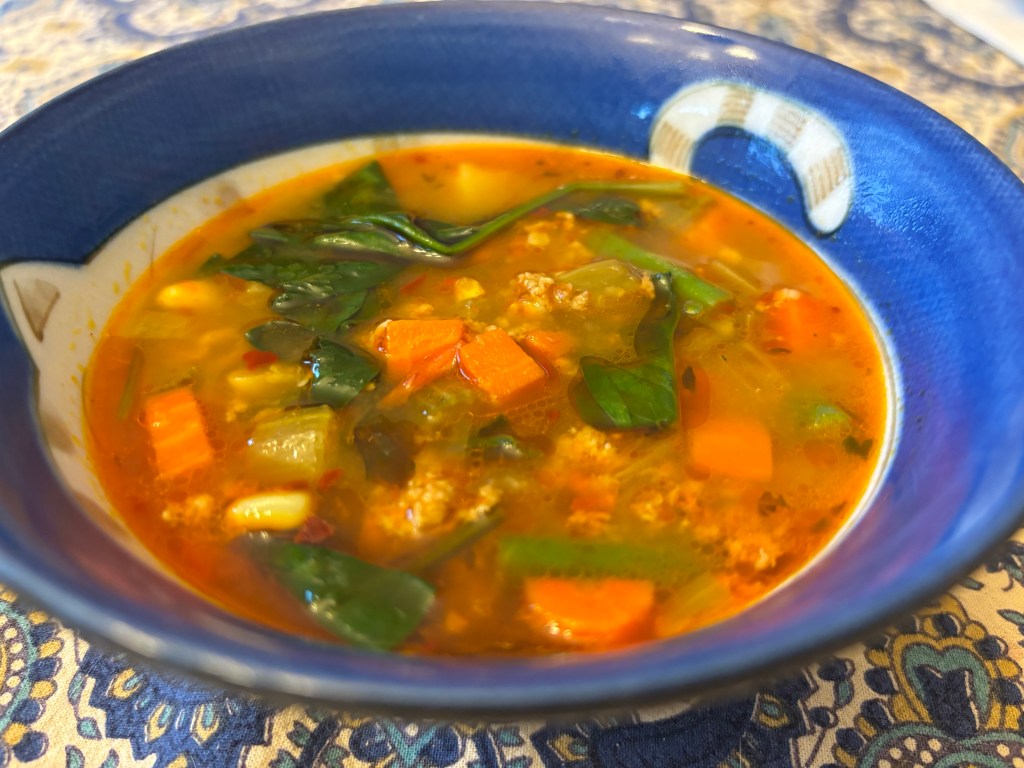
We had a craving for a vegetable-heavy soup with minced meat, so we tried this recipe: https://www.sandravalvassori.com/ground-turkey-soup/ For the vegetables, we used: carrots, celery, onion; Yukon potatoes (skin on), fresh tomatoes (see below); and fresh corn off the cob and baby spinach. This was a delicious and relatively healthy soup.
Our modifications: first, instead of Italian seasoning, we used approx 1-2 Tbsp each frozen Italian oregano and frozen thyme (leaves only).
Second, in lieu of 1 cup canned crushed tomatoes, we followed the tip to use fresh tomatoes (a combo of 1 Roma and a handful of grape tomatoes), which we crushed by hand.
Third, for the broth we used 1 quart (4 cups) unsalted chicken broth and 2 cups Better Than Bouillon chicken broth (2 tsp bouillon concentrate dissolved in 2 cups hot water).
Finally, at the end of cooking, in addition to the 1 Tbsp red wine vinegar, we added 1 tsp sugar and juice from 1/3 of a lemon for brightness.
-
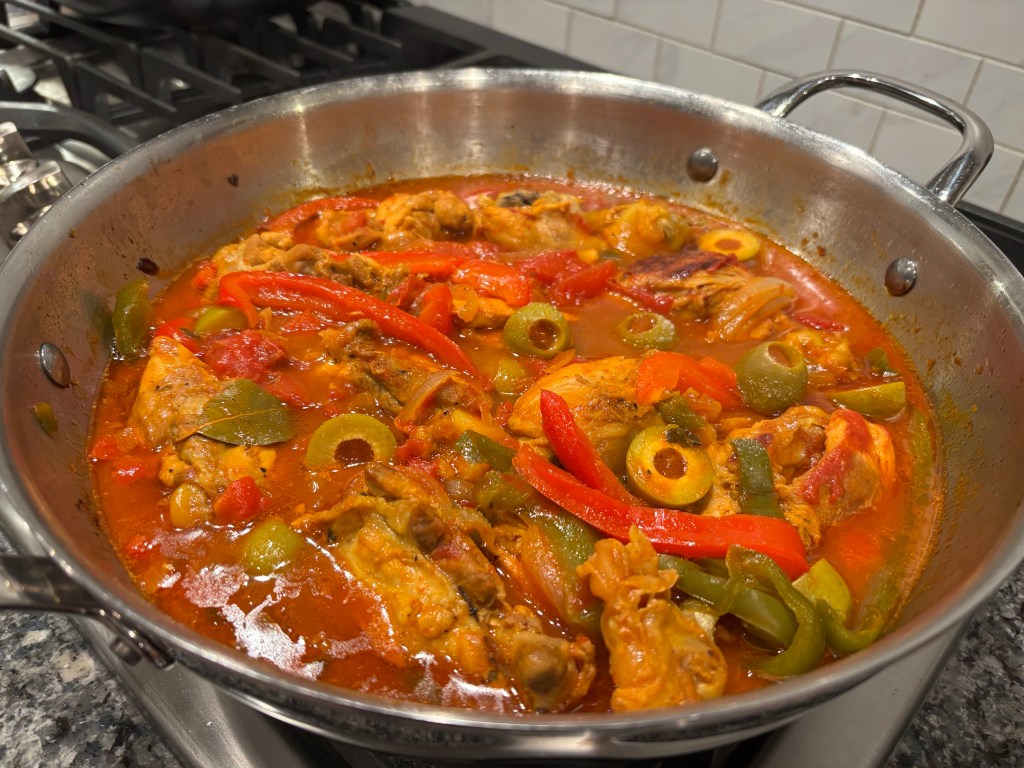
We made this dish, and it was delicious: https://www.sandravalvassori.com/dominican-pollo-guisado-braised-chicken/. We made the recipe in our Ultimate pan. We closely followed the instructions, but had minor modifications.
First, we used 4 chicken quarters. We skinned the quarters and cut them into three pieces each (drumstick plus the thigh cut into two parts), for a total of 12 pieces.
Second, for the two plum (aka Roma) tomatoes, we cut them in 16 pieces each (rather than quarters, which we thought might be too large). The recipe was confusing b/c the blogger initially referred to cutting the tomatoes into “quarters,” but later described them as “chopped.”
Third, we included 1 tsp Better Than Bouillon chicken in 1/4 cup hot water and 1 Tbsp tomato paste. As a result, we reduced the amount of olive brine to 2 tsp (from a few tablespoons) to avoid a too-salty dish.
We served the braised chicken with jasmine rice and fried sweet plantains (maduros), recipe here: https://piglettedc.wordpress.com/2025/10/04/fried-sweet-plantains-maduros/. (Oct. 2025)
-
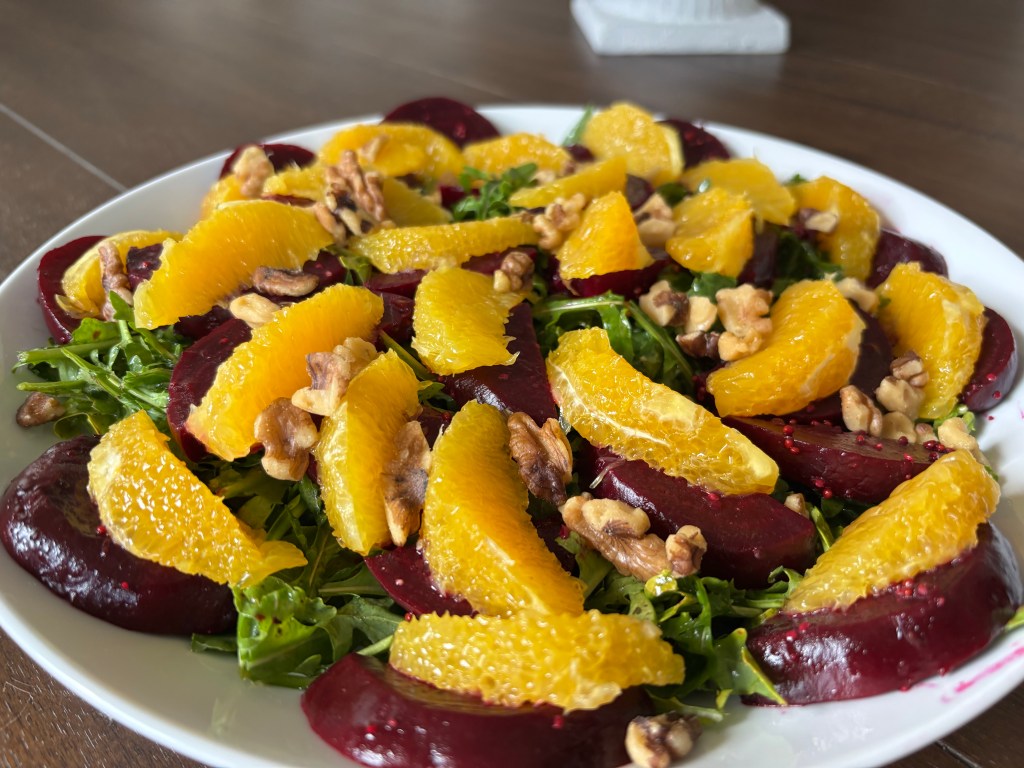
We made this recipe for a BBQ hosted by good friends: https://cooking.nytimes.com/recipes/1015857-beet-orange-and-arugula-salad?smid=ck-recipe-iOS-share. It was easy to prepare ahead of time as components (roasted and dressed beets, orange segments, dressing, arugula, and walnuts) that we later assembled at our friends’ home.
Our modifications: first, we found the dressing bland and too oily (see Note below). It completely lacked acidity. We rebalanced the dressing with 1.5 to 2 Tbsp Maille whole grain mustard, 1 Tbsp red wine vinegar, juice from 1/2 lime, and 1 tsp sugar.
Second, for the beets, we roasted at 400 for an hour. We followed this basic recipe: https://piglettedc.wordpress.com/2015/03/25/roasted-beets-this-is-one-of-my-favorite/.
Finally, we experimented with both baby arugula and baby mixed greens; we definitely recommend arugula for this dish. The arugula adds a peppery edge that complements the roasted beets and orange segments.
Once we adjusted the dressing to our liking, we enjoyed this dish a great deal. (Oct. 2025)
Note: We were unable to find grapeseed oil or sunflower seed oil, so we used 50-50 canola oil and olive oil. Perhaps grapeseed or sunflower would have made the dressing less oily.
-
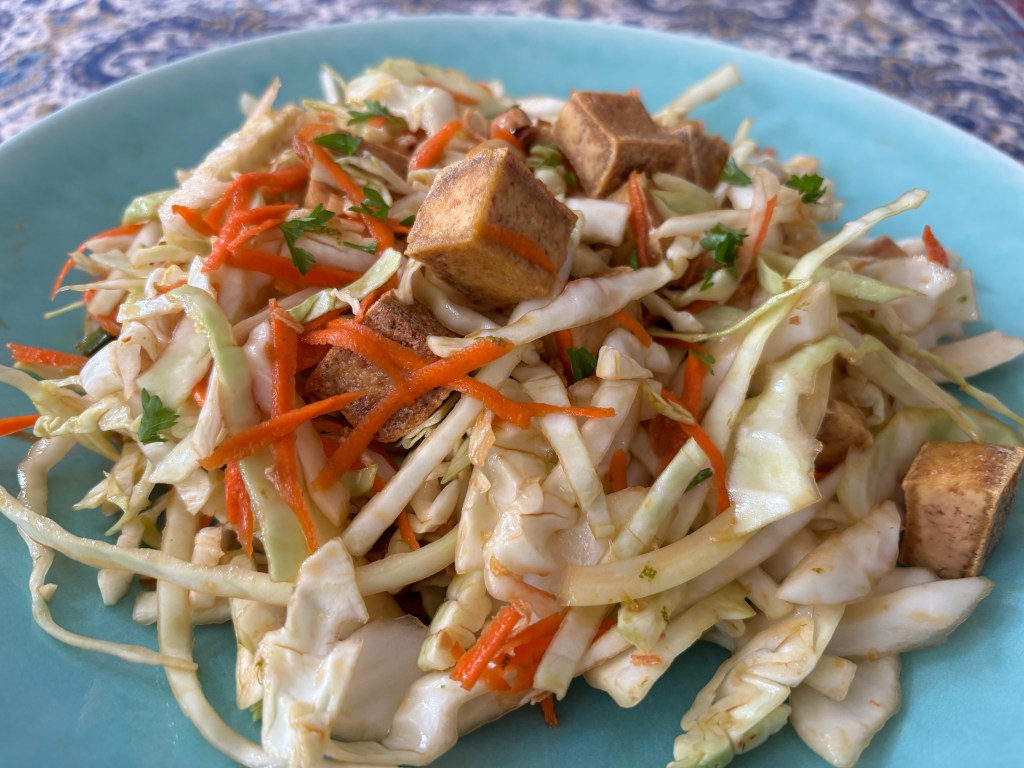
We decided to make this for a light lunch: https://cooking.nytimes.com/recipes/12372-vietnamese-inspired-cabbage-salad-with-tofu?smid=ck-recipe-iOS-share
Our modifications: first, we halved the amount of cabbage (to 3 cups shredded) and the salad dressing. At the same time, we maintained the original amounts of extra firm tofu, carrot, and peanut.
Second, for the extra firm tofu, we followed a method from SkinnyTaste to reduce excess water: as a first step, we placed the block b/w two paper towels on a rimmed cutting board, then placed a heavier cutting board on top (to further press down on the tofu and squeeze out water). We left the tofu in that press while prepping the salad dressing and shredding the cabbage and carrot. Then rather than frying in slabs, we went ahead and cubed the tofu (3/4” cubes), dried them off one last time with a new paper towel, and then pan-fried them in a preheated nonstick pan with 1 Tbsp canola oil. We made sure to sear most sides of the tofu cubes, and then we placed them altogether in a mixing bowl with the soy – fish sauce mixture (rather than brushing each piece individually). Once the tofu cubes were coated, we removed them from the bowl and discarded the excess sauce (to avoid saturating the tofu).
Third, for the salad dressing, instead of peanut oil, we used 1 part roasted sesame oil to 2 parts canola oil. We also found the amount of jalapeno insufficient for heat; we may double it in the future.
Finally, as garnish we used not only freshly roasted peanut halves (we didn’t chop them) but also 2 Tbsp fried shallots and 1 tsp minced parsley (we skipped the cilantro). This was delicious and refreshing, and we found the higher ratio of tofu to cabbage worked for our household. (Oct. 2025)
-
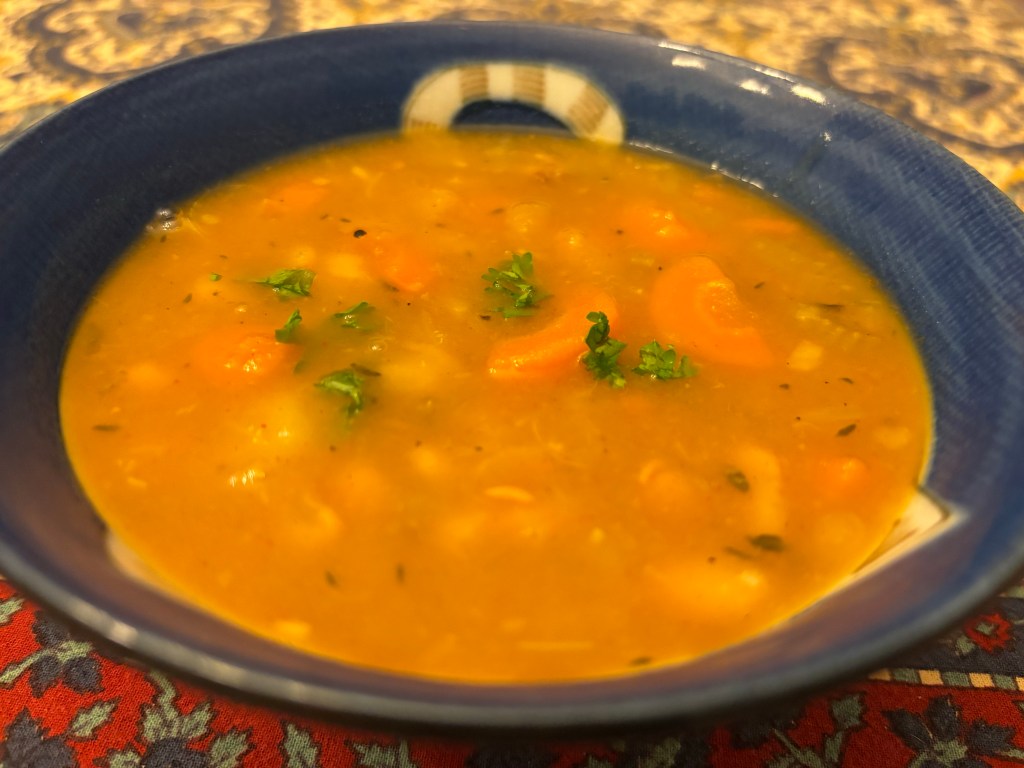
We have been curious about Senate navy bean soup for a while, and we decided to try this recipe: https://cooking.nytimes.com/recipes/1027174-slow-cooker-senate-bean-soup?smid=ck-recipe-iOS-share
Our modifications: first, we converted this recipe from a 6-8 hour slow cooker recipe to a Instant Pot (120 min high pressure) recipe. We based this conversion on RecipeTin Eats’ recipe for pea and ham soup: https://www.recipetineats.com/pea-and-ham-soup/
Second, following tips from others, we added 2 whole cloves along with beans, potatoes, carrots, etc. (The cloves were challenging to fish out at the end of cooking.)
Third, at the end of cooking, we added not only 1 Tbsp apple cider vinegar (per the recipe), but also 1.5 tsp Gravenstein apple vinegar, 1 tsp Worchestershire sauce, and 1 tsp sugar for balance. (Oct. 2025)
Note: We used 2 ham hocks, which added a lot of depth but did not yield much meat at all.
-
Subscribe
Subscribed
Already have a WordPress.com account? Log in now.
