-
I cook as a hobby, and I maintain this blog primarily to keep track of recipes that my family has enjoyed over the years. I started blogging back in 2015, in response to requests from friends for recipes they had seen me post on Facebook (but that I couldn’t easily catalog). My original blog was on another platform that became less user-friendly over time. I migrated my blog to WordPress earlier this year, and I’ve spent more time than expected reformatting the migrated posts.
This blog is and always will be a work in progress. For example, I currently provide Tags for posts, but I have not coded for Categories. I also generally try to share the recipes themselves in my posts, but in cases where the recipe is not available online, I try to identify the source (e.g., the cookbook title and author) as needed. In some cases, such as where a family has shared their recipe with me but hasn’t authorized me to share it widely, I post a photo of the dish with that proviso.
I recently added a Search widget to this blog. On the desktop version, the Search bar appears prominently on the left hand side. But for some reason, it is hidden on the mobile app. If you’re on your phone, tap on the SHOW tab at the top left of the home page. That will reveal another screen with the Search bar.
I hope you enjoy exploring my blog and find some recipes to try.
-
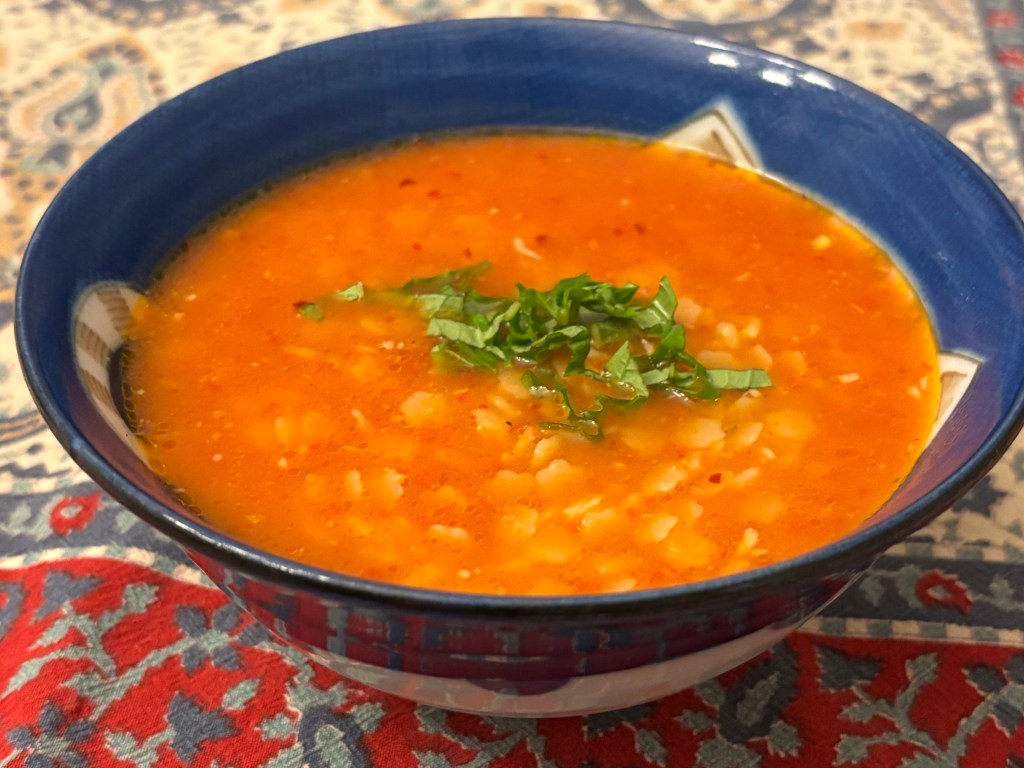
We tried this NYT Cooking recipe: https://cooking.nytimes.com/recipes/771009089-easy-tomato-and-stars-soup?smid=ck-recipe-iOS-share&cgs=c. This was delicious.
Our modifications: first, instead of 1 1/2 cups (12 oz) stelline pasta, we used 1 1/4 cups (about 10 oz). Second, we blended 4 medium Roma tomatoes, 1 medium shallot, 1 clove garlic, and 1 cup no-salt chicken broth. We then added 3 additional cups chicken broth and 1/2 cup water. We found 9 mins on medium heat was the right amount of cooking time for the stelline to become tender and the tomato soup to cook. Third, towards the end of cooking, we added 3 Tbsp shredded parmesan (see Note below), and a sprinkle each of crushed red pepper, sugar, and salt.
We garnished with julienned fresh basil. (Mar. 2026)
Note: The next time, we may either reduce the shredded parmesan to 2 Tbsp or add a parmesan rind instead at an earlier stage (along with the pureed tomato, broth, and water).
-
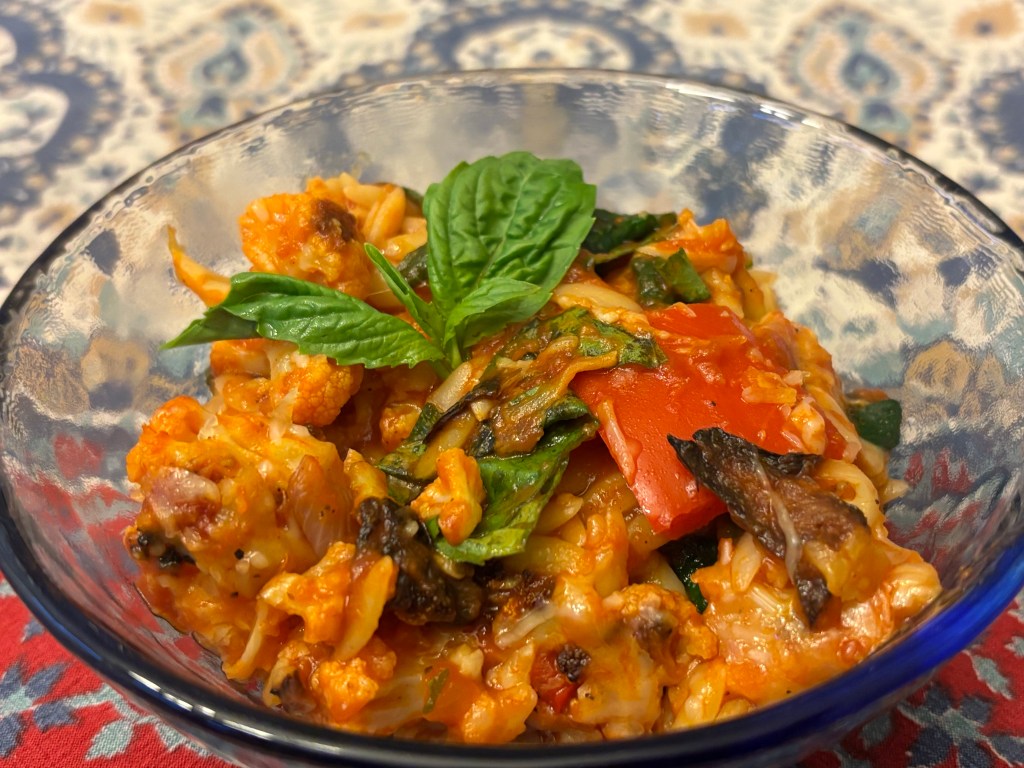
We love orzo with tomato sauce, and we took inspiration from this recipe: https://cooking.nytimes.com/recipes/1020823-cheesy-baked-orzo-with-marinara?smid=ck-recipe-iOS-share&cgs=c
Our modifications: first, we added a lot of roasted vegetables. We cut 3/4 of a medium cauliflower (saving the remaining 1/4 for another recipe), 1 large red bell pepper, and 2 large shallots into bite-sized pieces, tossed them with 1.5 Tbsp canola oil, sprinkled with salt and black pepper, and then roasted on three foil-lined rimmed baking sheets for 20 mins at 425. We set those aside while preparing the rest of the recipe, and we reduced the oven temp to 375 for the next steps.
Second, we cooked the 8 oz of orzo for 6 mins, then drained and set aside. We concurrently heated a large saute pan (we used an All-Clad stainless steel pan) on medium heat with 1 Tbsp olive oil, then sauteed 2 cloves garlic (minced) and 1/2 tsp crushed red pepper. We then folded in 5 oz baby spinach. (This was consistent with the NYT recipe.)
Third, we placed the roasted vegetables in a 13×9” casserole dish. We added the sauteed spinach, then the partially cooked orzo. For the sauce, we used 24 oz Rao’s marinara sauce, 8 oz no-salt tomato sauce, and 1/2 cup chicken broth. We added 1/2 cup julienned basil leaves to the sauce, then stirred the sauce into the orzo and vegetables.
Finally, we folded in 8 oz shredded mozzarella, and then sprinkled 1/3 cup grated parmesan on top. We covered the casserole dish with foil, then baked until the orzo was at dente (about 25 mins). (Mar. 2026)
-
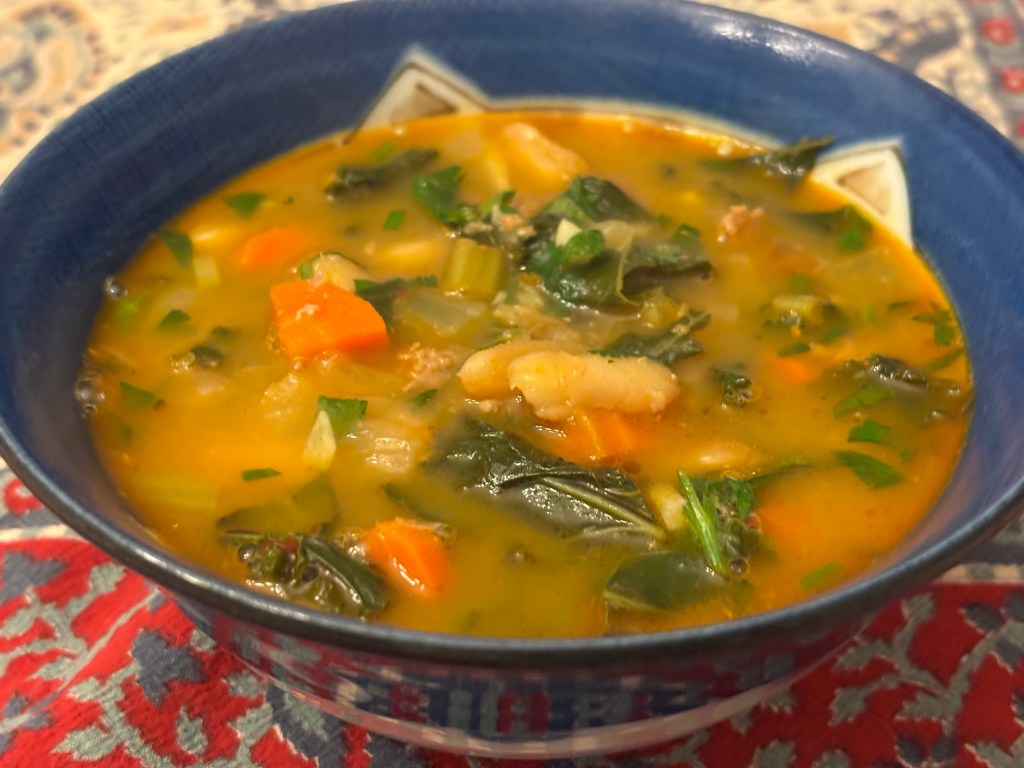
We tried this Melissa Clark recipe: https://cooking.nytimes.com/recipes/1021776-lemony-white-bean-soup-with-turkey-and-greens?smid=ck-recipe-iOS-share&cgs=c This soup contains simple ingredients, but yields surprisingly complex, layered flavors.
We followed the recipe closely. Our modifications: first, the greens, we used 1/2 a bunch of curly kale from Whole Foods. We included the stems, chopped them, and sauteed them with the onion and carrot.
Second, we doubled the microplaned ginger to 2 Tbsp and 1.5 tsp ground cumin. We also followed the tip to smash some of the canned beans (we used cannelini) to thicken the soup.
Third, we had only half a cup of fresh herbs: we added finely minced cilantro, parsley, and celery fronds.
Finally, at the end of cooking, we added a dash of sugar for balance.
The lemon juice and fresh herbs made a big difference. The soup also tasted like it was simmered with Parmesan rind, even though none was added. This was delicious and will be added to our regular rotation. (Mar. 2026)
-
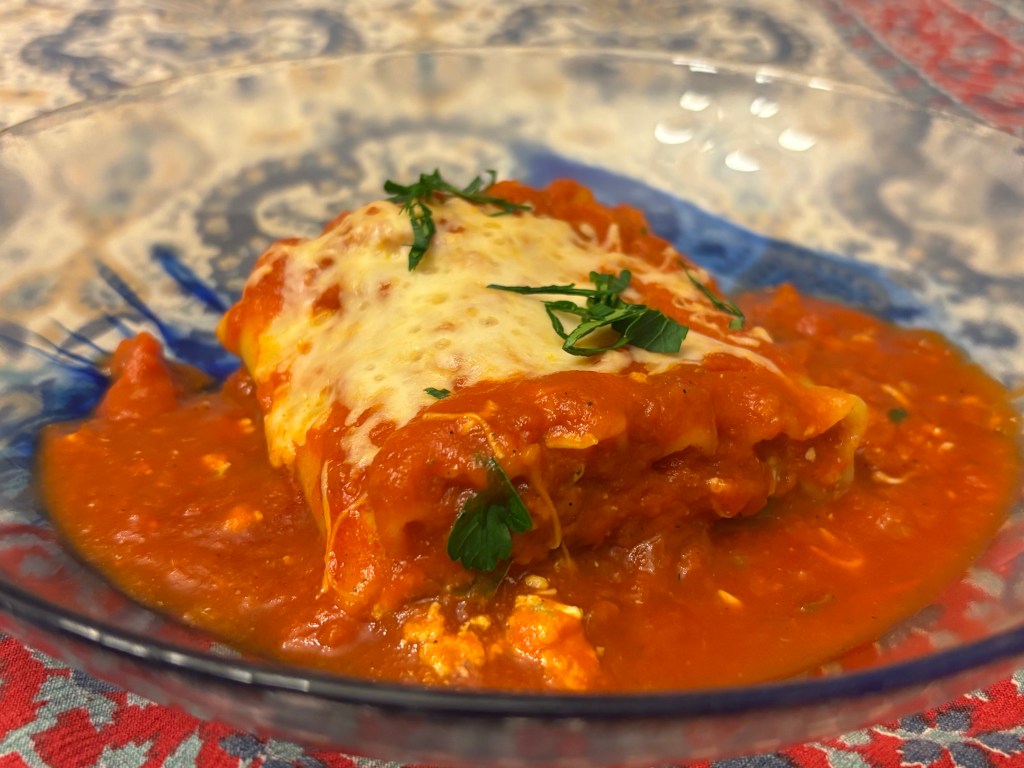
We are big fans of SkinnyTaste, and we enjoyed this recipe: https://www.skinnytaste.com/lasagna-roll-ups-with-cottage-cheese/. The cottage cheese worked really well.
Our modifications: first, for the marinara sauce, we combined 15.5 oz Rao’s marinara and 8 oz no-salt tomato sauce to reduce the sodium. (We also prefer saucy casseroles, so 2 cups from the original recipe seemed too dry.)
Second, we used 9 lasagna sheets instead of 8, and we had the right amount of filling. We boiled the lasagna sheets for 7 mins, 1 min less than regular cooking time. We didn’t have wax paper, but parchment worked fine to hold the cooked lasagna after we drained and dried each sheet.
Third, we added a handful of fresh baby spinach (about 1 oz), roughly chopped, to the ricotta-egg mixture.
This was delicious and easy. It’s definitely a keeper. (Mar. 2026)
-
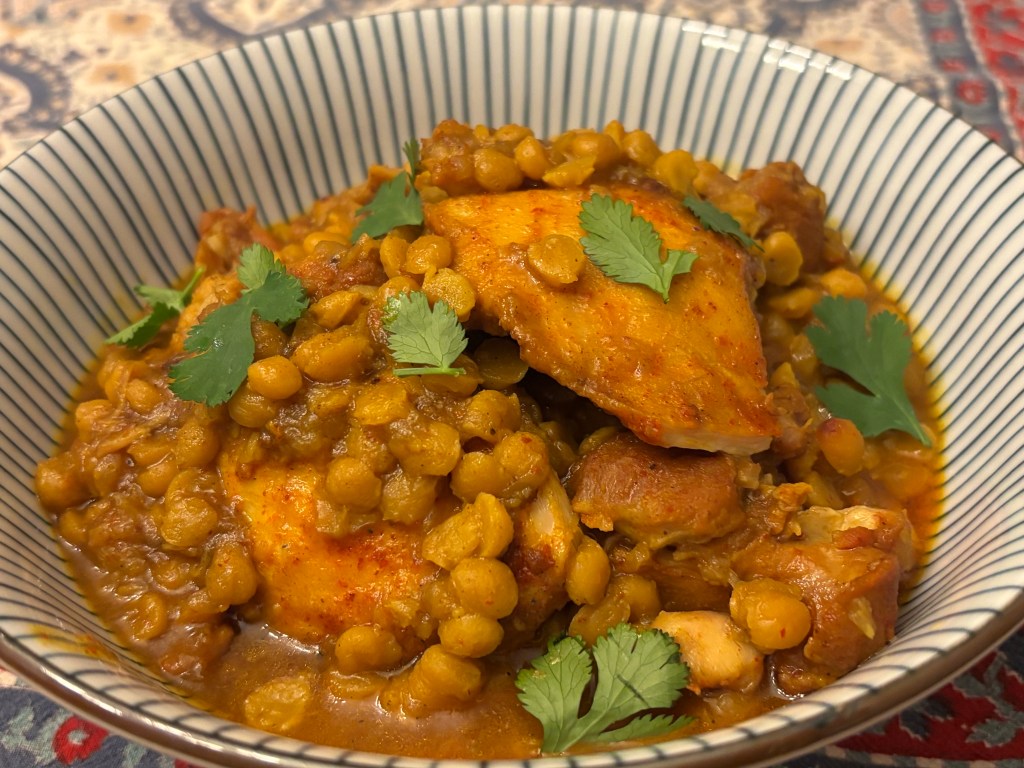
We tried a Skinnytaste adaptation of chicken dal curry from the Burmese Superstar cookbook: https://www.skinnytaste.com/burma-superstar-chicken-dal-curry/. The Skinnytaste author omitted fish sauce, which we added back in. We also incorporated some tips from her blogpost comments.
Our modifications: first, instead of an Instant Pot, we used a stovetop pressure cooker. (We prefer a stovetop over an electric device so that we can quickly pivot as needed.)
Second, we used 2.5 lb boneless skinless chicken thighs (instead of bone-in) and doubled the dried yellow split pea to 1 cup (from 1/2 cup).
Third, for the chicken marinade, we used 1 Tbsp Kashmiri (low heat) chili powder instead of paprika, 1 tsp turmeric, and 1 tsp fish sauce. After 20 mins and while the onion-garlic mixture was nearly done, we browned the marinated thighs in a nonstick pan (we did this in three batches), and then we used a silicone spatula to scrape the drippings into the pressure cooker.
Fourth, we microplaned the ginger (about 1 Tbsp) and we used a handheld chopper to mince 1 large onion, 1 shallot, and 6 garlic cloves (and we sauteed the onion, shallot, and garlic together rather than adding the garlic later). While sauteeing these aromatics, we used about 1 Tbsp canola oil.
Fifth, we increased the Madras (hot) curry powder to 2 tsp and the garam masala to 1 tsp. We also increased the water to 2 1/2 cups (instead of 2 1/4 cups) to accommodate the increase in legumes and dry spices. We used 2 large bay leaves.
Once the pressure cooker lid was shut, we waited until the pressure cooker hit high pressure, then reduced the heat in our stove dial (while also maintaining the high pressure) for 20 mins, then did a natural release.
We forgot to add fresh lime juice before serving, but the dish was delicious. We garnished with fresh cilantro and served with jasmine rice. (Feb. 2026)
-
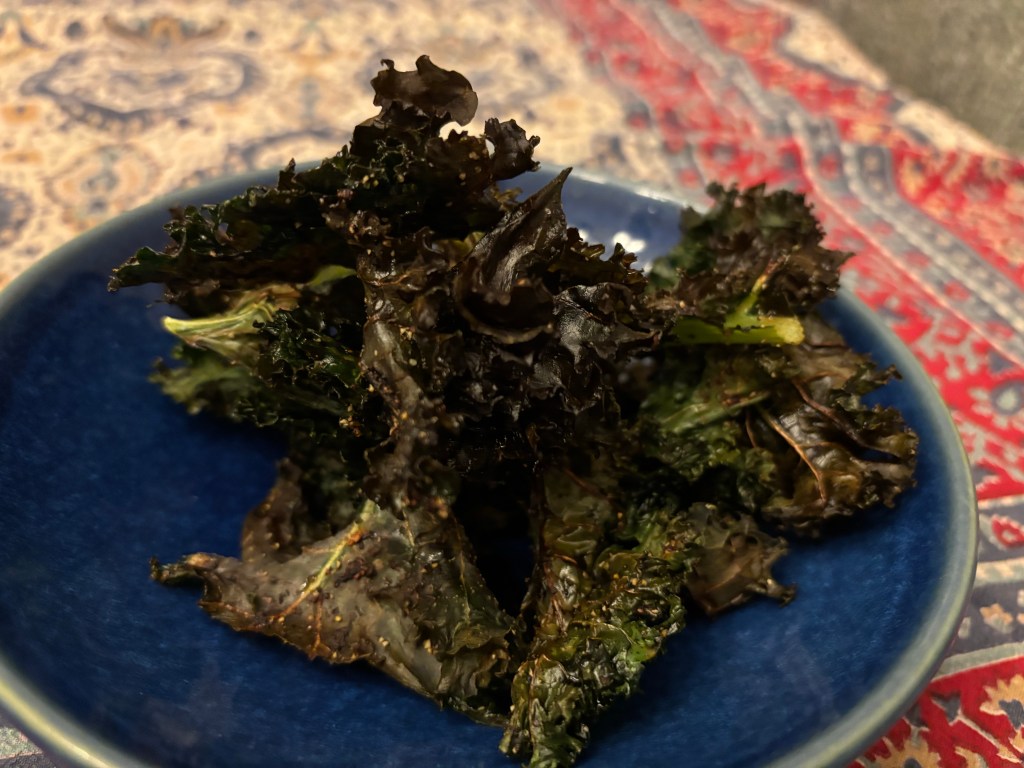
We bought an excess of kale by accident, so we made kale chips: https://www.bonappetit.com/story/how-to-make-kale-chips.
We preheated the oven to 375. We also used a salad spinner to dry out as much as possible. We placed the torn kale in a large mixing bowl, drizzling with olive oil. We separated them on three foil-lined rimmed baking sheets. We sprinkled one tray with kosher salt, a second with Penzey’s taco seasonings, and a third with lemon pepper. We baked them for 15 mins, rotating trays. (Feb. 2026)
-
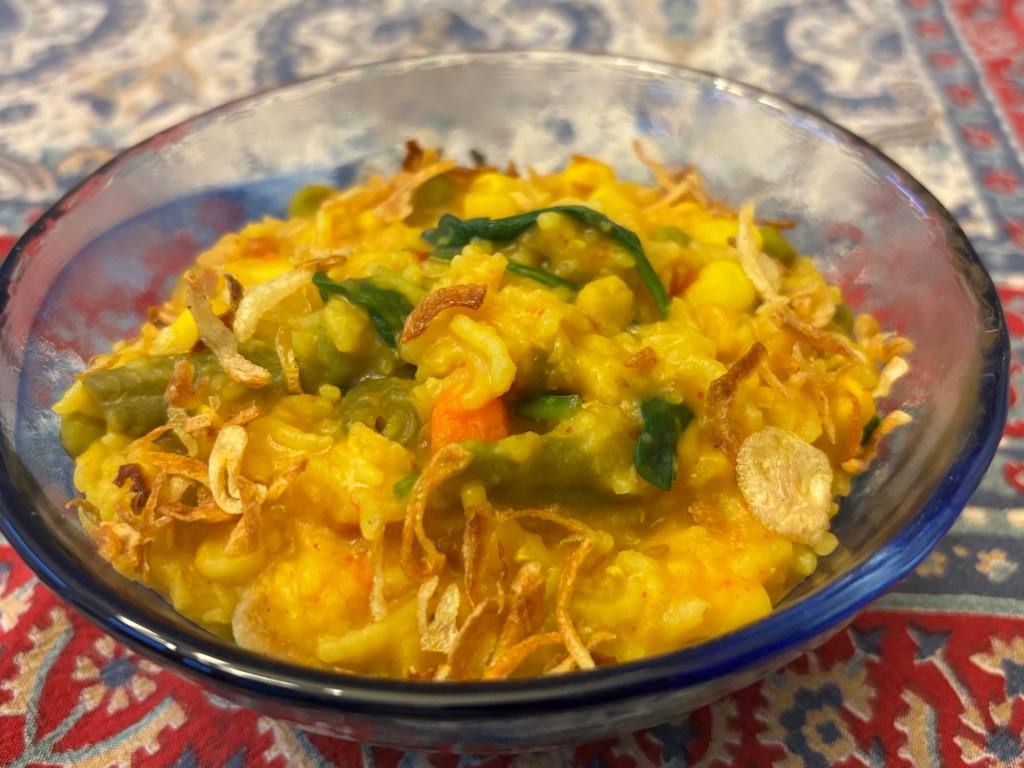
We had a craving for a hearty vegetable khichdi that utilized many type of legumes. We tried this recipe: https://ministryofcurry.com/khichdi-instant-pot/ This was a mild, but slightly over seasoned khichdi.
Our modifications: first, for the 4 cups of vegetables, we used 3 cups frozen mixed vegetables. We also used about 2 oz of fresh baby spinach, which we added after the khichdi had finished cooking. Second, we did not have fresh tomatoes, so we used 1 cup canned diced no-salt tomatoes. Finally, when serving, we garnished with fresh cilantro and with fried shallots for mouthfeel. (Feb. 2026)
-

We love keema peas and basmati rice, so we decided to try this one-pot recipe: https://cooking.nytimes.com/recipes/1026138-one-pot-spiced-turkey-and-rice?smid=ck-recipe-iOS-share This was delicious.
Our modifications: first, in response to comments to the NYT recipes, we doubled the wet aromatics (6 garlic cloves, 2 inches frozen ginger, and 1/2 jalapeño pepper, seeded), which we minced together in a handheld food processor. We also doubled the dry spices (1 Tbsp garam masala, 1/2 tsp ground cinnamon, 1/2 tsp kashmiri red pepper powder, and 1/2 tsp salt). We kept the remaining ingredients (turkey, basmati rice, and tomato paste) the same as in the original recipe.
Second, we reduced the water to 2 cups (instead of 2.5 cups), which still left the final dish tender and slightly moist.
Third, after folding in 1 cup peas, we covered and simmered for 4 mins. Upon serving, we garnished with fresh cilantro. We enjoyed this with pickled lemon (Priya brand). (Feb. 2026)
-
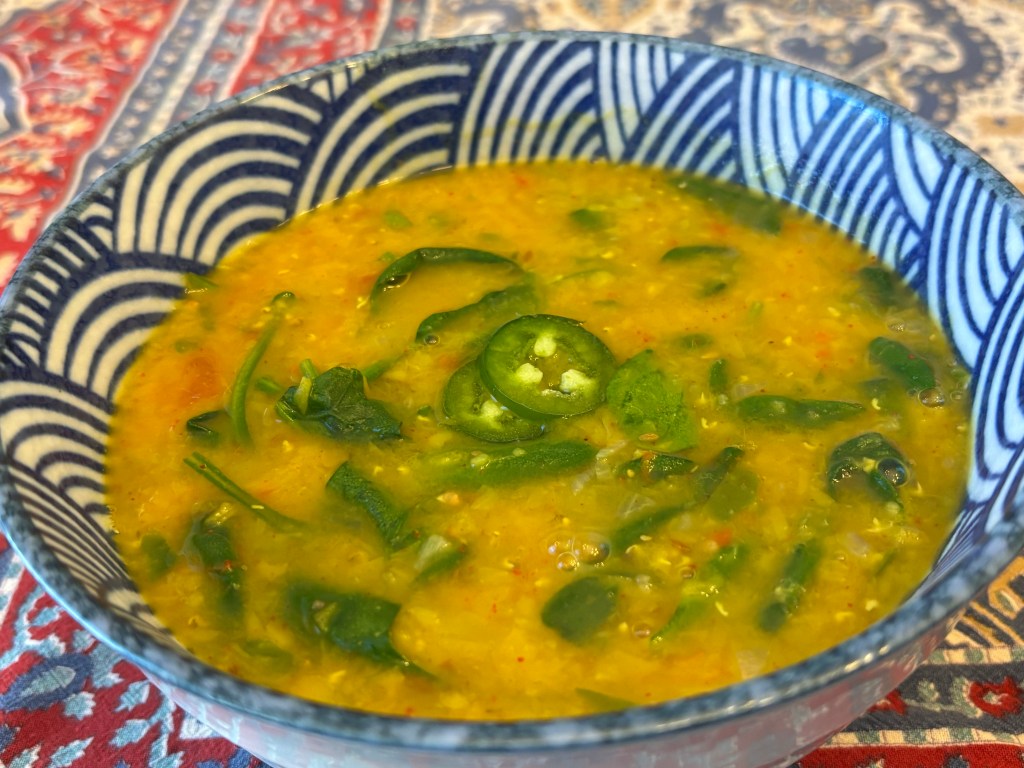
We purchased whole red lentils specifically to try this recipe by Shubhra Ramineni from her cookbook, Healthy Indian Vegetarian Cooking. We followed the instructions but were unable to keep the whole red lentils intact.
Rinse and drain 1/2 cup dried whole red lentils. Place the lentils in a small pot, along with 1 small tomato (quartered), 1/4 tsp each turmeric and Kashmiri red pepper, and 1/2 tsp salt. Pour in 2 3/4 cup water. Bring to a rolling boil, then cover and reduce to a simmer for about 35 mins, stirring and mashing the tomato periodically. Optional: add a few handfuls of fresh baby spinach (about 1 loose cup).
Separately, prepare the tadka: heat a small nonstick pan. Add 1 Tbsp ghee, then saute 1 minced shallot, 1/2 of a fresh jalapeño (minced), and 1/4 cumin seeds. Once the mixture is fragrant and slightly browned. We served this with freshly made basmati rice, and we garnished with thinly sliced fresh jalapeño. (Feb. 2026)
-
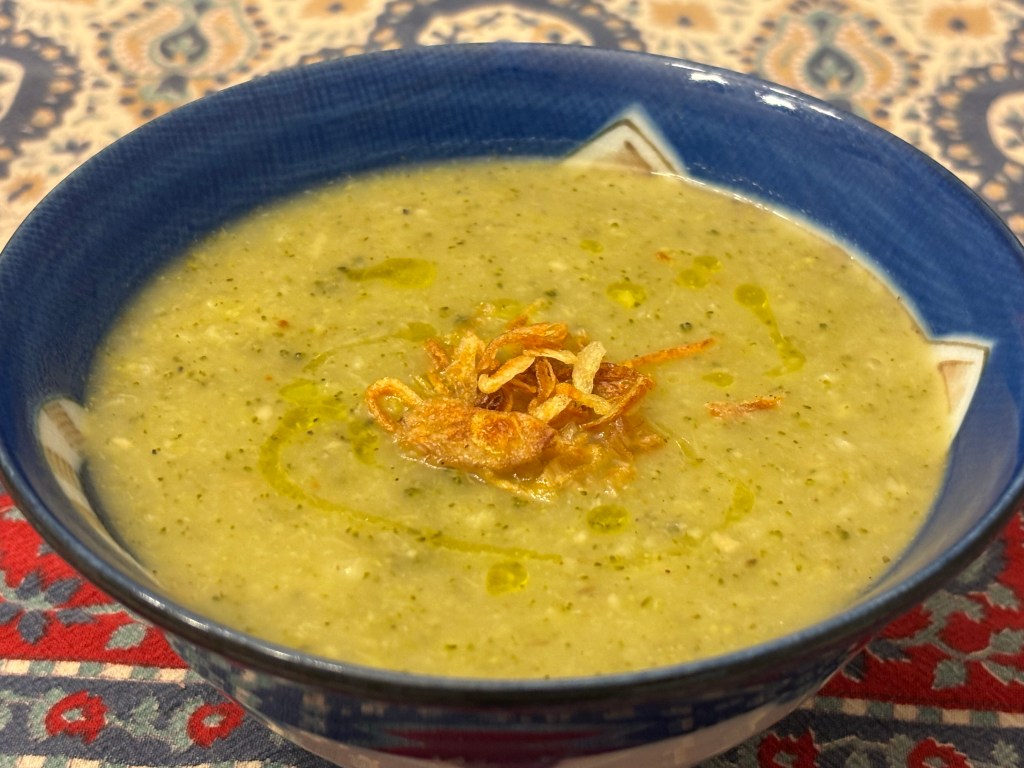
My husband loves broccoli and we both love potato-based soups, so we tried this recipe: https://cooking.nytimes.com/recipes/767814516-broccoli-and-potato-soup?smid=ck-recipe-iOS-share We favor non-creamy, broth-based soups, and this fit the bill.
Our modifications: first, instead of 1 lb baby potatoes, we used 2 medium and 1 large Yukon potatoes. We partially peeled the potatoes and cut them into 2×1” chunks.
Second, we used 1.5 lb broccoli crowns, which we cut into 2” pieces. Because we anticipated the potatoes would take longer to cook, we added 1 quart broth (we used chicken broth), 2 cups water, and 3 parmesan rinds to the potato chunks. We brought to a boil, then reduced to low-medium heat. Five minutes later, we added the broccoli chunks and simmered on low-medium for an additional 15 mins.
Third, after turning off the heat, we removed the parmesan rinds and set them aside. Then, we used a hand immersion blender to roughly puree the soup.
Fourth, we folded in 1/2 cup shredded parmesan (reduced from 1 cup) and re-added the parmesan rinds to the soup. We simmered for a few mins, stirring the soup and letting it thicken. We also added 1/2 tsp Aleppo pepper.
When serving the soup, we garnished with a light drizzle of olive oil and fried shallots. This was a very tasty soup. (Jan. 2026)
-
Subscribe
Subscribed
Already have a WordPress.com account? Log in now.
